Sometimes, you’ll want to make your blog private for many reasons – maybe you’re installing a new layout and don’t want people to get caught in-between the layouts, making your blog look ugly, maybe you need a blog break or maybe you just don’t want to write on that blog anymore but don’t want anyone to see it.
Whatever your reasons are for this, it’s pretty simple to do on most blog platforms, so we’ve collected all the details in one place in case you ever need to know!
Blogger
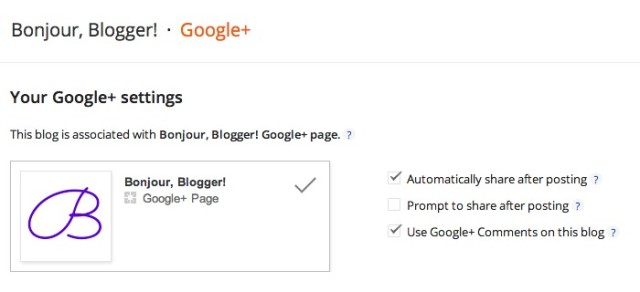
If you’ve made the switch to using Google + comments, then the bad news is that it’s not quite as simple to make your blog private as it is if they were disabled. The good news is that in our tests, we didn’t lose any comments by switching off Google + comments to turn the blog private – however, if you are just switching your blog to private to do something like tweak your HTML, we would recommend setting up a separate Blogger blog to test any changes on instead, then copy everything over in the template when it’s perfect.
If you have Google+ comments enabled, to switch them off, head to the Google + button in your Dashboard, and untick “Use Google+ Comments on this blog”
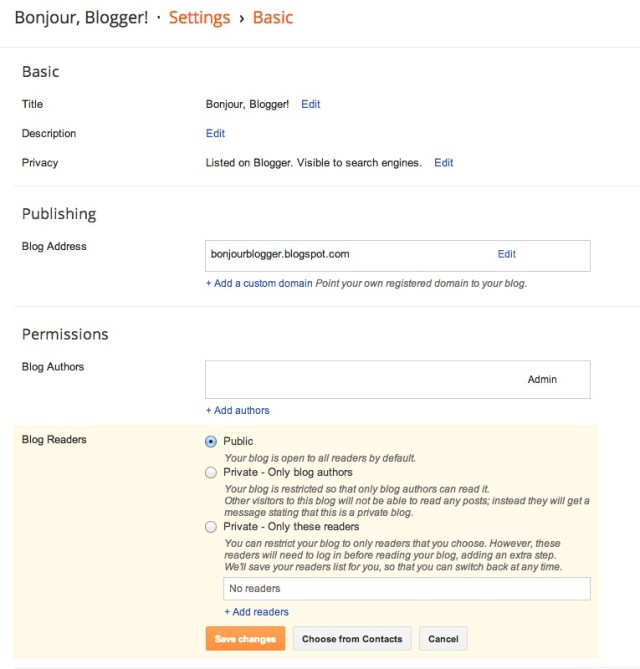
Once you’ve done that, or if you didn’t have them enabled in the first place, head to the Settings section, and under the “Blog Readers” heading in the “Basic” subsection, click edit and choose who you want to be able to see the blog.
While your blog is still private, you won’t be able to enable Google + comments (as you can see above!)
WordPress.com (hosted by WordPress)
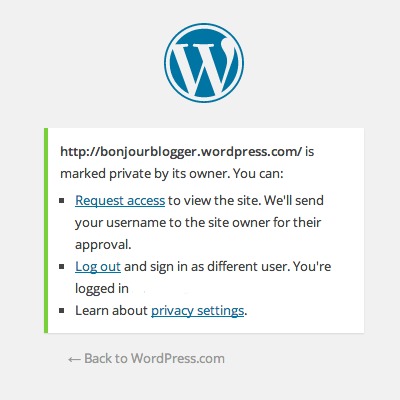
If you’re on WP.com, then to make your blog private, head to the Reading subsection under Settings in your Dashboard, and check “I would like my site to be private, visible only to users I choose” under Site Visibility. Nice and simple! Your readers will see the following screen:
4
WordPress.org (self hosted WordPress)
Sometimes, WordPress.com has features built into it that aren’t there in a self hosted WordPress set up (it’s rare, but this is one of the few occasions!) so to turn your blog private, you’ll need to use a plugin. There are so many out there to choose from, but we’ve tested the following three which all worked pretty well:
Private Only by Kate Mag
This plugin shows unlogged in users the standard WordPress login page, but allows you to provide a link to a public page so new readers can read a little about me (for example) before registering for an account.
Private Blog by Volcanic Pixels
This plugin allows you to set a password without requiring readers to register for a user account on your site. It has a lot more features available, (such as having different passwords, or logging all login attempts) but only once you’ve purchased a premium licence (which is £10 for one active site – you can switch the licence between your various blogs, but only one can be in use at a time.)
jonradio Private Site by jonradio
This is a pretty basic plugin which will just redirect users to the WP login page but it works well!
As with any plugin installation, be aware that plugins can affect your website in negative ways – take back ups if you’re not sure!
Tumblr
Unfortunately, on Tumblr, you’re not able to make your primary blog private – and you can’t switch which is your primary blog. The only thing that you’re able to do is turn each post into a private one – but this can be quite time consuming!
Missing E is a browser plugin that promises to allow you to mass convert posts to private – however it hasn’t been updated in almost a year, during which time, Tumblr has changed how their site works. Frustrating!


