We spoke last week in our first HTML help post about it, but we thought it was worth discussing in a bit more detail because it’s a minor addition to your blog posts that will not just help your blog, but also really benefit your readers and keep them coming back.
Have you noticed that when you hover over some images online, a box of text will pop up to tell you what the image contains? That’s the alt text. The main thing that it’s used for is to clearly describe what is happening in the image. A reader with visual impairments will rely on alt text to give some context to the article or blog post they’re reading – their browser will have an add-on or plugin that reads out what the alt text says.
An added benefit of this is that you end up telling search engines what the image is of as well. This means that your search rankings are given a bit of a boost – obviously Google can’t see images!
Alt text can be inserted into both image tags and links – you would just include the following into both types of html:
alt="this is what the image or link is about"
So, for example, if you had an outfit post with a few images, you could put in the first image:
<img src="outfit-post-1.jpg" alt="Photo of person wearing green dress">
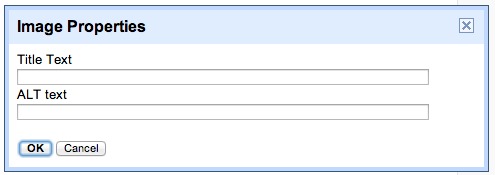
If you’re still not sure about using the HTML editing view, then you can add alt text onto your images using the rich text version. In Blogger, you will need to insert the image into your blog post, then click on it to bring up the following pop up underneath:
Click on the “Properties” link, and you’ll see the following.
The Alt text box is where you’ll need to fill in the image description, then just click OK!
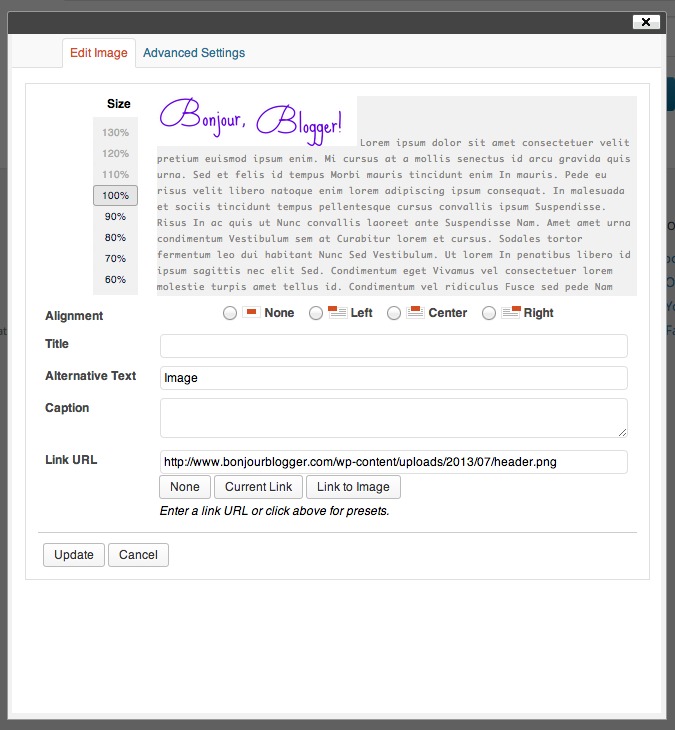
In WordPress.com, you’ll also need to insert the image that you want into the blog post, then click on the edit image icon as shown:
The following will pop up. The alt text on this is the alternative text box.
For a self hosted WordPress website, it’s pretty similar to the WordPress.com process, but you can also edit the details while uploading the image:
Just add the details into the Alt Text box while the image is uploading, and then click insert into post once you’re done!
According to the RNIB website, if you have images that are used to separate out your blog posts (or perhaps – using the previous example – if you’ve done an outfit post with a few photos that are fairly similar in description), to tell the viewers screen reader to ignore those images, you would just leave the alt text blank:
<img src="decoration-1.jpg" alt="">
There is a lot more information available from the RNIB about when to use alt text, but these will all be dependent on what sort of website you’re creating. One that may be relevant to bloggers though is when an image is made up of text – e.g. an infographic – you should include the text from the image into the alt text since the screen readers might not read text from the image.
You never know who is going to be looking at your blog, so make sure it’s accessible for everyone!


This post is very helpful. I’m a new blogger and i’m a little confused before how to use alt text. But with your post, i was able to apply it to my blog
Thanks again!