So, you’ve decided to go ahead and start a blog and after reading this post about which platform is best, you’ve chosen to go with Blogger. Hooray! We’ve put together this step by step guide to talk you through setting it up – we can’t be there to physically hold your hand, but we can break down every bit down for you to make it seem much less daunting. You’ll be wondering what took you so long before.
First – and perhaps most importantly! – you need to choose your blog name. You’re going to be known by this name whenever you go to meetups, etc, so try to choose something catchy, easy to say, and that isn’t going to be embarrassing or dated. You can see how some of our favourite bloggers chose their names here.
OK! So now you’ve got the name – you need the blog. If you’ve already got a Google account (and who doesn’t these days?) that you want to use with your blog, skip ahead to step 4. If, however, you don’t have one, or you want a separate email address for your blog (which we totally recommend – it makes it so much easier to keep track of blog emails!) then you’ll need to create an account.
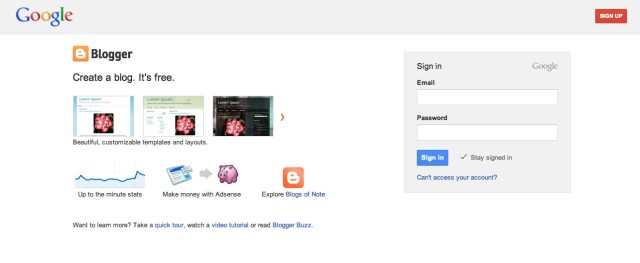
1. This is the blogger.com homepage if you’re not signed in. Click the sign up button in the top right corner.
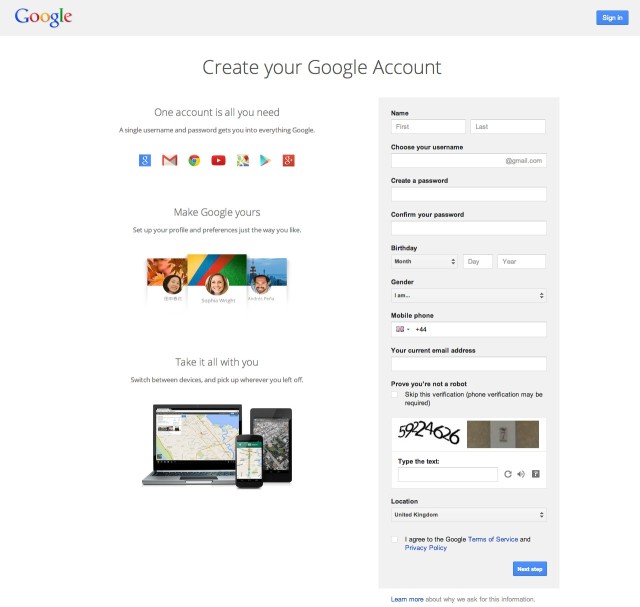
2. This is the sign up form. A few details, and that blog will be yours! The form is pretty straight forward – the only thing that might be a bit confusing is where it says to provide your mobile phone number. That will be your normal phone number without the first 0. Instead of doing the Captcha on the page, you can have a verification text sent to your phone. If you are going to use this account as your blog email as well, it’s a good idea to turn on 2-step verification as it’s an added layer of protection if someone did get your password. You can find out more about that in the Google help pages.
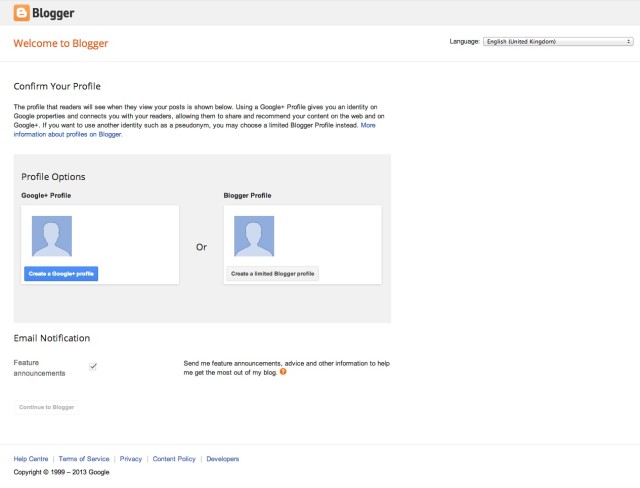
3. Choose whether you want a full Google+ profile for this account, or whether you want to use the basic Blogger profile. Google are still pushing their users to move to Google+ accounts, but it’s up to you. If you do choose the basic Blogger profile, you can upgrade at a later point.
4. That’s it! If you already had a Google account, then this is the step to start from. Actually setting up your blog is ridiculously easy from this point! Click the “New Blog” button.
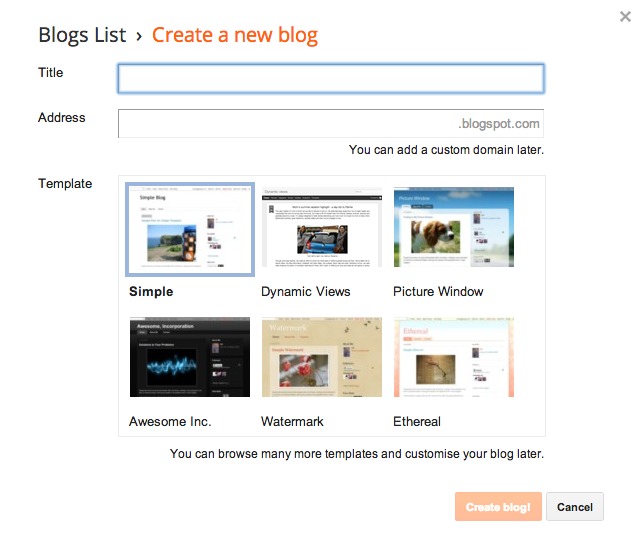
5. Give the blog a title, and whatever you want the address to be goes in the address box. Don’t worry too much about the template right now – you can change that later!
6. You’re ready to blog! Click the orange pencil icon, and blog blog blog!


