In case you missed it, we run a monthly bloggy meet up in Bristol called #blogclub. It’s a great way to get together with your favourite bloggers, catch up on gossip, bounce ideas around, and probably eat too much cake.
Because the space that we use is limited in how many people can be in there, we use Eventbrite for people to claim a space, and thought it was worth going into in some detail to help you guys if you’re thinking about organising an event but are puzzled about the guest list.
Eventbrite is a ticketing site that is simple for both the event organiser and attendee to use. It’s free to use if your tickets are free – ideal if you’re just organising a blog meet up and want to get an idea of numbers, especially if there’s a limit at your venue – but if you’re selling tickets (as the Christmas party organised by South West Bloggers did to raise money for Macmillan in 2012) then fees are 2.5% + 65p per ticket, plus 3.5% for the credit card processing fee (or if you use Paypal, then you’ll pay for their processing fees) You can choose whether to include all fees in the ticket price, or charge the additional fee on top.
So, how to organise an event? It’s super easy – you’ll need an Eventbrite account (of course!), and once you log in, you’ll see the following screen:
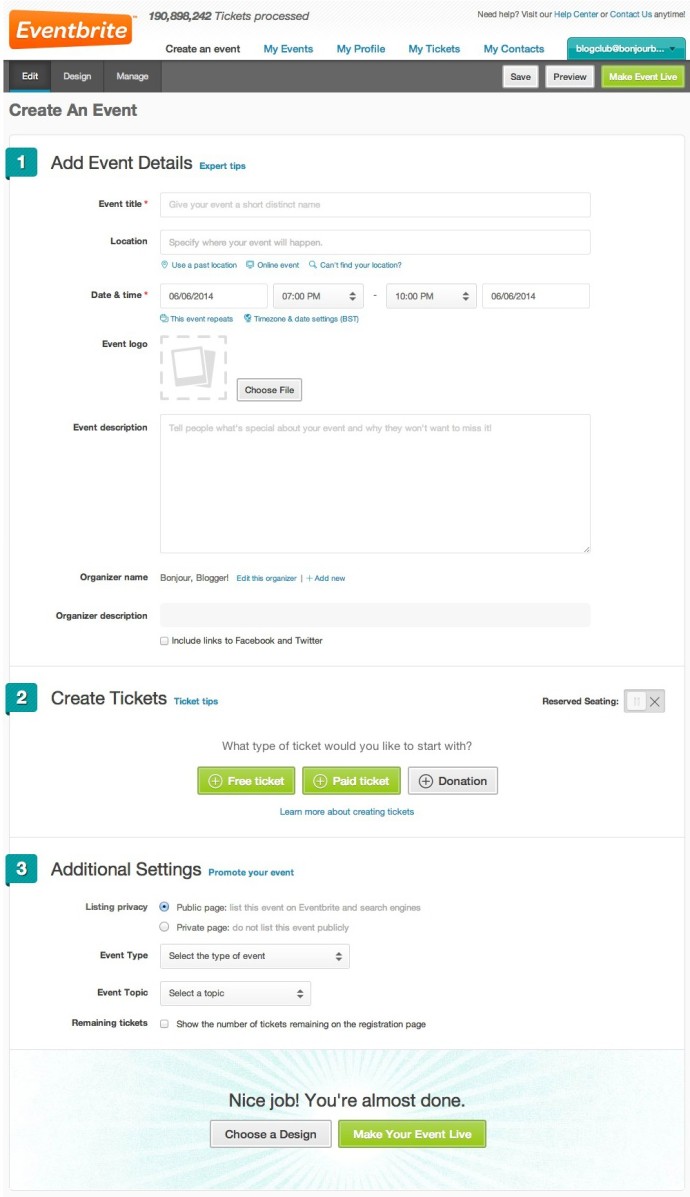
Click the “Create New Event” button and you’ll be taken to the basics screen. Here you need to provide the main details of the event – name, where, description, etc
There are three types of tickets you can have – free, paid or donation. For paid and donation tickets, click the gear icon on each line to choose how the fees are paid. There’s a new feature for paid tickets where you can create a seating plan and allow specific seats to be bought.
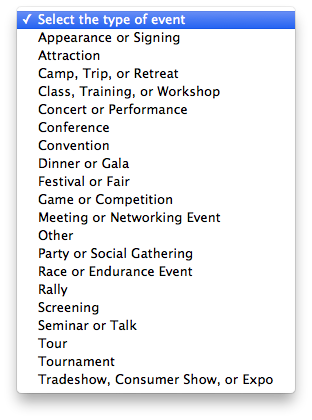
The event type drop down is so you can define what type of event it is – the list is huge!
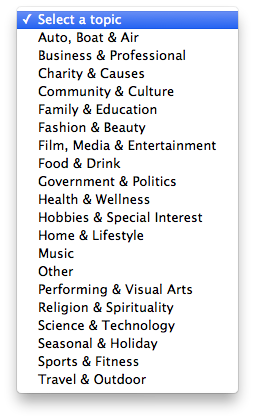
The topic drop down is so you can narrow down the topic of the event – useful for other people who will be searching on Eventbrite for things happening that they might be interested in.
You can either publish the event as is, or click through to the next screen to choose the design of the event page to match your branding.
You can save, preview or make the event live from this page as well. Once you make the event live, you can still edit it if you forget anything!
That’s it! Your event is now live – if people need to pay/donate for tickets, then you need to choose the payment method details, but for free events, you just need to promote the page!
If you’re organising an event, make sure to check out the apps that Eventbrite has for your mobile device – it will make checking in people much easier. The attendees can show tickets on their mobile device as well, and if they’re iOS users, then the tickets can be stored in Passbook.


